Testing code in React Native

First steps into learning to test code in React Native.
Summary
We already know that React Native is a great framework which helps you to ship apps easily on iOS, Android and many other platforms. By doing this kind of multi-platform development your code will impact more users than before and this comes with some responsibility, you need to make sure that everything will work properly, to do that, you can add another layer of assurance by testing your code.
Jest
Jest is a great framework which helps you to write unit tests and UI tests for your React Native codebase. You can test a simple function, a component or an entire flow. It also helps if you want to mock something: a function, a class or an entire library.
Jest comes pre-installed and pre-configured in your React Native project, if not check out this guide on how to add it.
Let’s create a new React Native app from scratch. If you have everything in place this command should be enough.
npx react-native init GuuApp
If not, feel free to read here about React Native and how to get started.
If you look closely in your project file structure you will see a directory called tests. That’s where your test files will go.
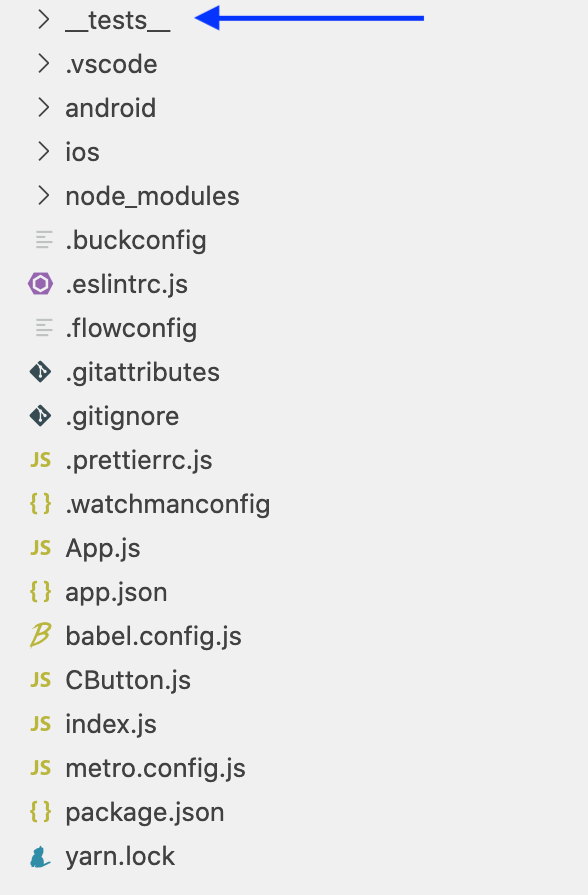
In there you already have an initial test, called App-test.js, let’s have a look.
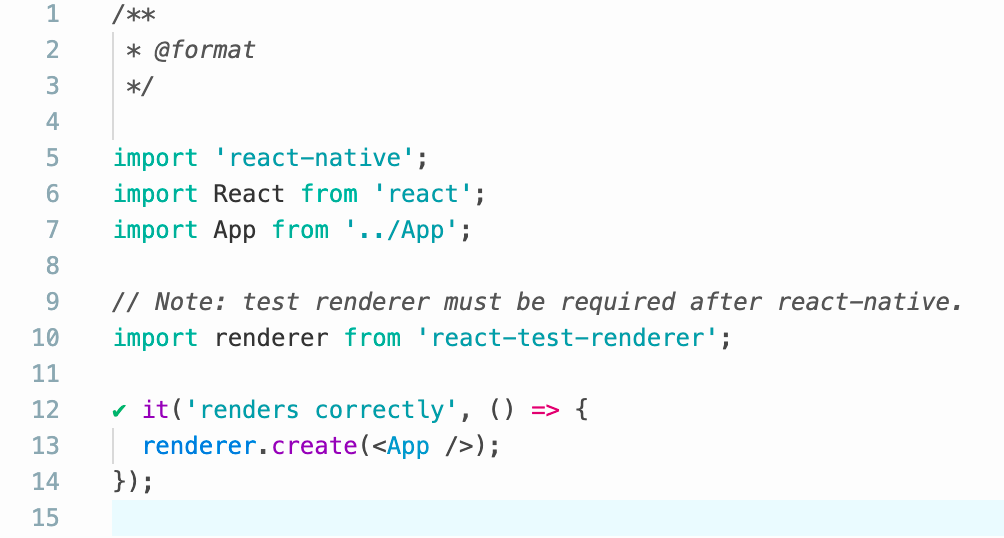
First test
Let’s focus a bit on these lines:
it('renders correctly', () => {
  renderer.create(<App />);
});
“it” is just a an alias for test, it helps to read tests more easily.The first parameter, ‘renders correctly’, is name of your test and the second one is a function where you will render you component and make your assertions.
Basically this test will make sure that the
What if you want to be more specific in you tests?
Jest comes to help with plenty of methods and techniques. First let’s make a custom component something simple, like a button.
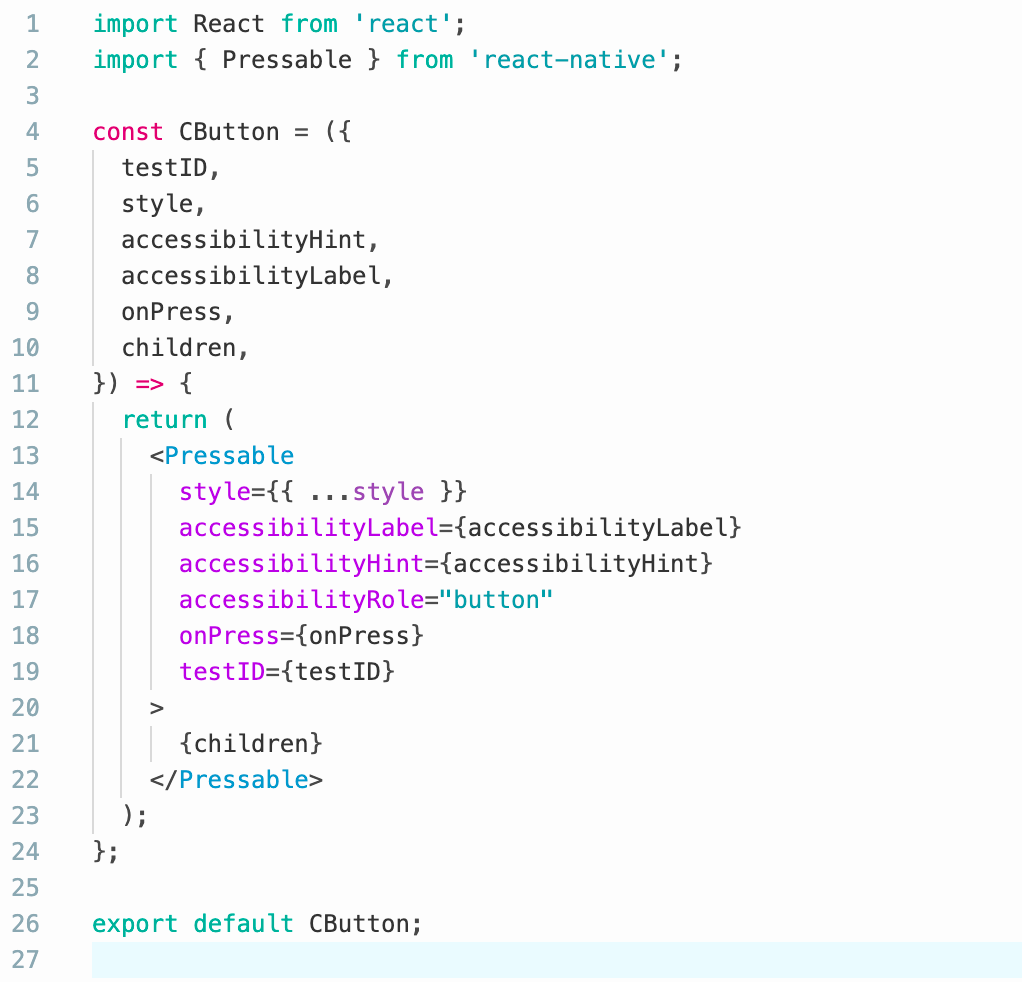
The first thing that we need to do is to create a new file in our tests directory, there we will start to write tests for CButton component.
import 'react-native';
import React from 'react';
import {
  render,
  fireEvent,
  waitForElement,
} from '@testing-library/react-native';

import CButton from '../CButton';

const props = {
  onPress: () => {},
  testID: 'CButton',
};
Here we’re just importing some helper methods and the component itself. @testing-library/react-native comes with an another set of helper methods, check them out here.
In the props const we’re holding some common props that will be reused for each test. testID maybe seems a bit strange, but it will make sense later.
So let’s write our first test.
it('Should render properly', () => {
    const { baseElement } = render(<CButton {...props} />);
    expect(baseElement).toBeTruthy();
});
This test will only make sure that the component can be successfully rendered without any errors with those common props from props constant.
const { baseElement } = render(<CButton {...props} />);
This line just renders the component, the assertion part is done by the next line.
expect(baseElement).toBeTruthy();
Basically we’re making sure that baseElement will be truthy, if you don’t what is that in JS, take a pause and check this explanation.
Next test will try to add some new props and test again the component to see if still rendering without errors.
it('Should render with `style` property', () => {
    const alteredProps = {
      ...props,
      style: {
        color: 'red',
      },
    };
    const { baseElement } = render(<CButton {...alteredProps} />);
    expect(baseElement).toBeTruthy();
  });
We added something new here, alteredProps is a new set of props with that style prop. The next lines are the same.
Testing a function prop
Let’s do something more interesting. We saw that this component also contains an onPress prop, let’s write a test that will make sure that the CButton component will call onPress prop when the click event occurs.
it('Should call the onPress function on click event`', async () => {
    const mockCallBack = jest.fn();
    /* ... */
  });
The line number 2 show us the first occurrence of the mocking idea. When you mock something you basically try to mimic some behaviour, but mimicking it in a way that is enough to be sure that your code will successfully work with that real-life implementation.
it('Should call the onPress function on click event`', async () => {
    const mockCallBack = jest.fn();
    const alteredProps = {
      ...props,
      onPress: mockCallBack,
    };
    /* ... */
  });
Next we link that mocked function with onPress prop.
Maybe you’re wondering why. Why to define another function called mockCallBack? Why not just using that simple function from here:
const props = {
  onPress: () => {},
  testID: 'CButton',
};
That’s because we want to know if onPress function was called one single time after a click event and we need to somehow spy that function.
Now let’s explain what is that testID prop, this prop is very useful for these next lines.
it('Should call the onPress function on click event`', async () => {
    const mockCallBack = jest.fn();
    const alteredProps = {
      ...props,
      onPress: mockCallBack,
    };
    const { getByTestId } = render(<CButton {...alteredProps} />);
    const button = await waitForElement(() => getByTestId('CButton'));
    /* ... */
  });
To be able to get the actual reference of CButton component we need an id.
Ok, now we have the button component in place, let’s simulate a click event and check if our mockCallBack was called after that.
it('Should call the onPress function on click event`', async () => {
    const mockCallBack = jest.fn();
    const alteredProps = {
      ...props,
      onPress: mockCallBack,
    };
    const { getByTestId } = render(<CButton {...alteredProps} />);
    const button = await waitForElement(() => getByTestId('CButton'));
    fireEvent.press(button);
    expect(mockCallBack.mock.calls.length).toEqual(1);
  });
  describe
fireEvent is you friend, it knows many other tricks, like scroll, changeText, submitEditing; it helps on many other testing scenarios.
expect(mockCallBack.mock.calls.length).toEqual(1);
This our key line, this assertion will make sure that the number of calls of mockCallBack will be one.
That’s it!
Here we have three tests, to make everything nicer we can group them in a test suite, to do this we will use describe.
describe('CButton', () => {
  it('Should render properly', () => {
    const { baseElement } = render(<CButton {...props} />);
    expect(baseElement).toBeTruthy();
  });

  it('Should render with `style` property', () => {
    const alteredProps = {
      ...props,
      style: {
        color: 'red',
      },
    };
    const { baseElement } = render(<CButton {...alteredProps} />);
    fireEvent.press(baseElement)
    expect(baseElement).toBeTruthy();
  });

  it('Should call the onPress function on click event`', async () => {
    const mockCallBack = jest.fn();
    const alteredProps = {
      ...props,
      onPress: mockCallBack,
    };
    const { getByTestId } = render(<CButton {...alteredProps} />);
    const button = await waitForElement(() => getByTestId('CButton'));
    fireEvent.press(button);
    expect(mockCallBack.mock.calls.length).toEqual(1);
  });
});
Here we presented some simple examples, but be sure that you can do even more with Jest and @testing-library/react-native.
Tests are a critical piece in software development, by writing them you’ll be able to deliver quality and to be confident about it.
Explore more like this

react-native-get-random-values for the New Architecture
When working with cryptographic operations in JavaScript, especially in libraries like @aws-amplify/react-native, access to a secure random number generator is essential. In browsers, the crypto.getRandomValues() method is typically used for...

Cut React Native Build Times by 75% with Artifact Caching
Reducing your build times is achievable by recycling your native build artifacts. In this guide, I will walk you through the steps required to implement this process effectively.
Comments